Mounting Solutions for Industrial Displays
Mounting solution is a collection of different kinds of mounting methods that can help you to know how to mount your product correctly and rapidly. Mounting solution can also guide you to find the product that really fit your needs. Now, lets take a look of various mounting methods:
• Panel Mount Various applications utilizing VESA Mounting Interface Standard:
• Open Frame Mount • Desktop Mount
• Rear Mount • Wall Mount
• VESA Mount • Arm Mount
PANEL MOUNT
Mounting method that mounts product into an opening of a customer’s fixture (mounting wall) from the front and secured from the rear. All user controls are located on the rear of the mechanism, making the panel mount displays a good choice for applications requiring a display with no external or exposed controls such as gaming/casino system, ATM, and kiosk.
Installation Steps
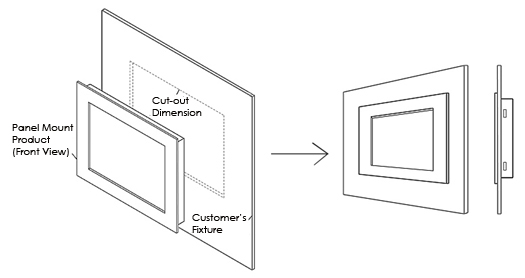

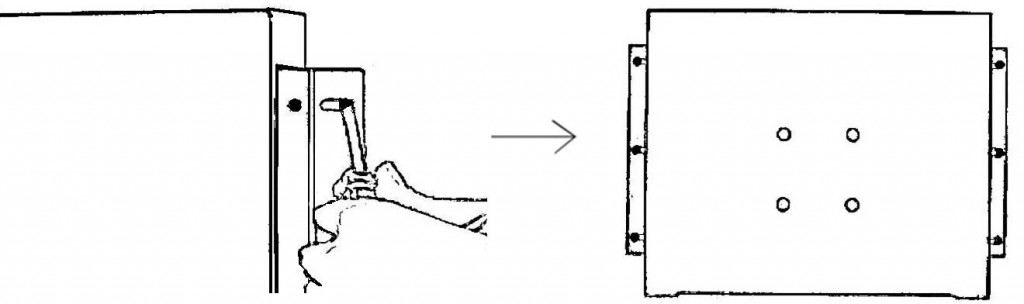
1. Put panel mount product in the cut out from the front side of the customer’s fixture, with the sides of the front bezel shown on the outside.
2. Use provided mounting kits to attach and tighten the panel mount product to the customer’s fixture as figure shown above.
**Panel Mount for IP65 rated Front Bezel Panel PC

IP65 rated Panel PC has a special rubber on the rear of front bezel to seal front bezel and customer’s fixture to prevent water and dust.
OPEN FRAME MOUNT
Mounting method that mounts products on customized front bezel. Open frame mounting might be done from rear or front sides. Acnodes offers open frame Panel PCs and display monitors, they are specially designed units with a bezel-less display which allows customers to design front bezel according to their application requirements.
Installation Steps
1. Put open frame mount product in the cut out from the front or rear side of the customer’s fixture.
2. Fasten with the screw from the front or the rear of customer’s fixture.
**The length of screws depends on the thickness of customer’s fixture
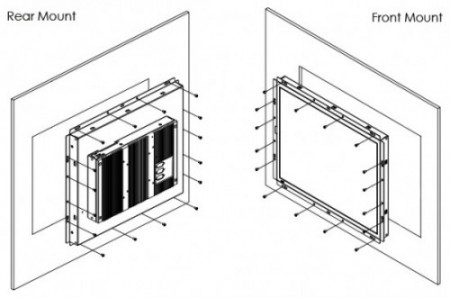
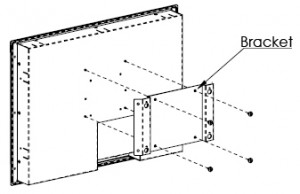
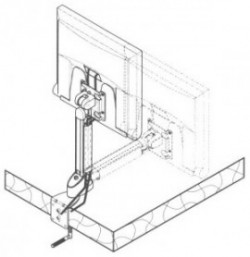
REAR MOUNT
Mounting method that mounts products from the rear and secured by a bracket on left and right sides or top and bottom sides. They are widely used when there is a safety consideration, for example, ATMs.
Installation Steps
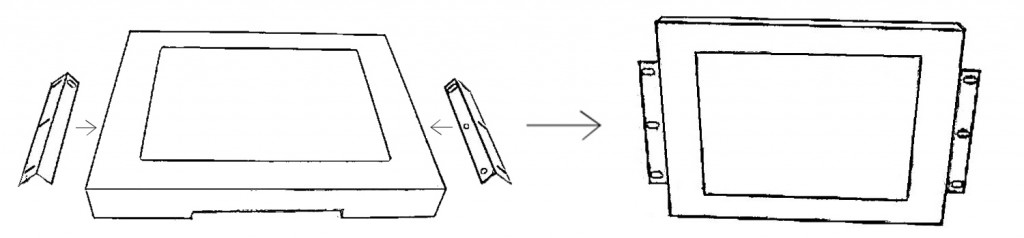
1. Screw the brackets on both sides of the rear mount product.
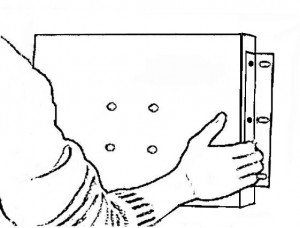
2. Secure the unit from the rear side of the customer’s fixture.
3. Make sure your screws are tight and on the right position, so the outer frame can be covered to ensure the safety of your display
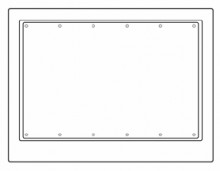
VESA MOUNT
Mounting interface standard for flat displays defined by VESA (Video Electronics Standards Association). It supports a broad range of mounting options including desktop, wall, and arm mounting applications. Most manufacturers comply with this standard by adhering to an industry-wide hole pattern on the back of their displays for mounting purposes. A typical VESA hole pattern for flat panel displays can be one of the following sizes:
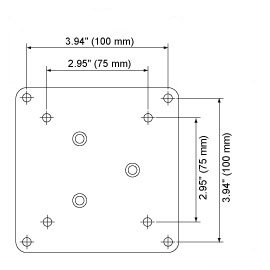
• 75 mm x 75 mm (75 mm = 2.95 inches)
• 100 mm x 100 mm (100mm = 3.94 inches)
Various applications utilizing VESA Mounting Interface Standard:
Desktop Mount
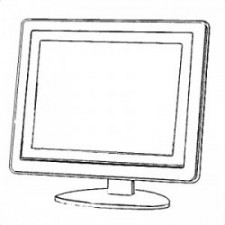
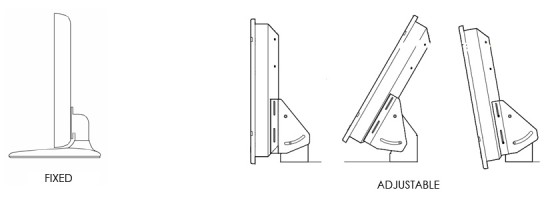
Mounting method that mounts products on a desk using the desktop stand. There is a traditional fixed desktop mount and an adjustable desktop mount for applications requires display tilt, making it easier to adjust any angle you want for best visibility. Desktop mounting is easy to set up and easy for everyone to use and adjust.
Installation Steps
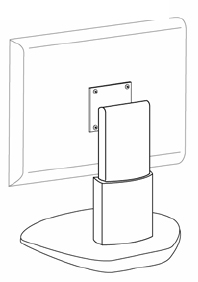
1. Assemble the desktop stand to the chassis, and fix the screws.
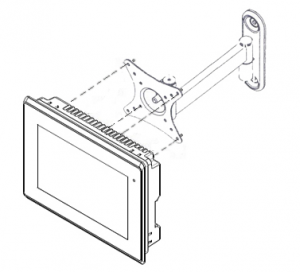
Mounting method that mount products on the wall which helps to save floor space.
Installation Steps
1. Mount the wall mounting bracket to the back cover of the unit
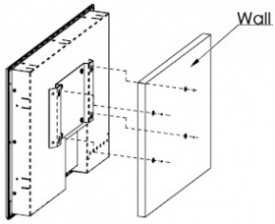
2. Mount the unit to the wall
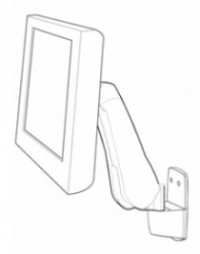
Mounting method that mounts products using arm bracket which allow users to tilt, swivel, and extend for maximum viewing flexibility.
Installation Steps
1. Assemble the arm bracket to the chassis, and fix the screws.
Sources & Pictures from Advantech, Nexcom, VESA