How to change ATX to AT power mode for FES8621 embedded computer
Locate jumper (JP1) inside the internal embedded system board. Once JP1 has been located, you will need to remove the jumper from the two pins. This will enable AT power mode (auto power) for the FES8621.
The figure below shows the area of the board where JP1 is located. To enable auto power on, remove the jumper from JP1.
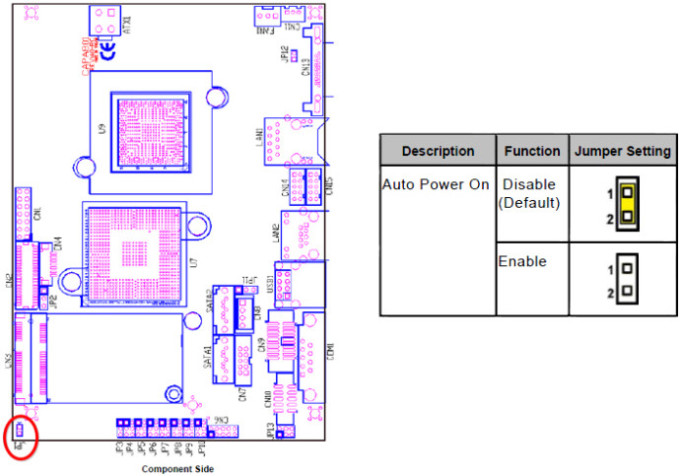
Auto power on jumper (JP1)
When JP1 is enabled for AC power input, the embedded system will automatically reboot without having to press the soft power button switch. When JP1 is disabled, a manual press of the power button is needed in order for the embedded system to boot.
AT stands for "Advanced Technology.":
The PSU (power supply unit) sends a direct signal to the mother board and starts its boot sequence.
The ATX stands for "Advanced Technology Extended”:
An on board “power on” jumper cable is connect to the motherboard. Once this “power on” button has been pressed, the mother board sends a signal to the PSU to power up. It then does a self-test and provides power and starts its boot sequence.
Advantages of an ATX vs AT, is that the motherboard has constant power applied but is not utilized until the push of a button. This allows for sleep mode which in turn saves power. The AT function needs no external input to power on. It turns on automatically when power is connected. This is useful for remote systems that may experience power outages and interruptons.
We provide our embedded computers with the “AT power” mode option for applications that need automatic reboots on power loss.